Setting Up OpenWrt
I’ve been using an ASUS router that had an OpenVPN server. However, the router firmware did not allow using SSL certs as the form of authentication and I had to maintain usernames and passwords for all users that I wanted to access the house’s LAN remotely. I recently found a router at Goodwill for $5 and decided to use it as my main router, firewall, and, eventually, VPN server. I’ve used DD-WRT in the past, but OpenWrt is new to me. Here’s what I did for the initial setup of the system.

The $5 router I found is a Linksys WRT610N v2. It has one core at 480MHz, 64MB of RAM, and 8MB of flash memory. Just enough to run OpenWrt and LuCI. I’ll also be running an ASUS RT-ACRH17 as a wireless access point. The ASUS provides much better wireless coverage.
The initial install of OpenWrt is very straightforward on the WRT610N. I had my laptop connected to the existing wireless network in my house to have an internet connection available and connected the WRT610N via a hard line. That way I could do the initial setup on the router without having traffic from the general internet hitting the router.
The factory Linksys firmware has a web mananagement console with a firmware update page. I found my router in the OpenWrt table of hardware, went to the WRT610N v2 device page and downloaded the firmware installation bin file. I then uploaded that file to the Linksys firmware update page and hit Start Upgrade.

After the flashing LEDs stabilized on the router, I logged into LuCI at 192.168.1.1 and changed the password. I also changed the network to use a different subnet. Since my ultimate goal is to use this as a VPN server, I don’t need my subnet at home colliding with anyone elses.
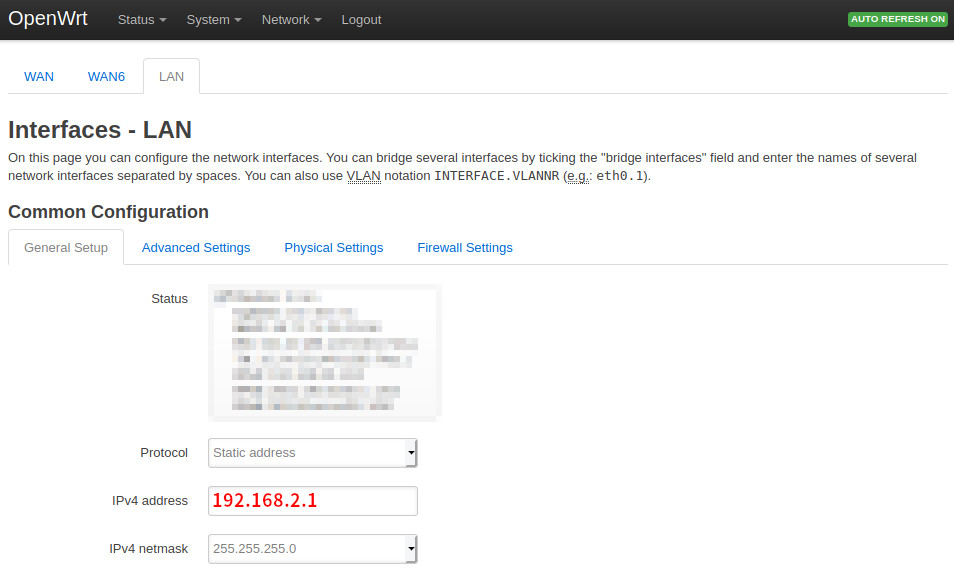
Changing the subnet in LuCI is a bit tricky. There’s an open bug in LuCI where changing the LAN IP makes the router unreachable and ultimately rolls back the change you want. However, I stumbled upon a workaround. When I made the change to the IPv4 address in the Network > Interfaces > LAN > General Setup section, hit Save & Apply, then opened a new browser tab and went to the new address I just configured, I would be able to get to LuCI and prevent the system from rolling back.
Here’s a concrete example: Let’s assume the router is currently configured with an IPv4 address of 192.168.1.1. I would like to update that IPv4 address, and the LAN subnet, to be 192.168.2.1 and 192.168.2.0/24, respectively. I would navigate to the LuCI management page Network > Interfaces and select the LAN tab. I would then update the IPv4 address to 192.168.2.1 and hit Save & Apply. Next, I would open a new browser tab and go to 192.168.2.1. I ended up hitting F5 (refresh) quite a few times because I was impatient. Eventually, LuCI would show up with a banner showing that the configuration was correctly applied.
Moving right along, it’s finally time to plug this thing into the internet. I powered down my ASUS router, plugged the internet into the WAN port of the WRT610N, and powered it up. I still had a hard line from my laptop to the router. Once the system came up, I logged into LuCI and verified that the connection to my ISP was live, opened a browser on my laptop and went to any site.
Once I verified the internet actually worked, I did a factory reset on my ASUS router, connected via hard line, logged in, changed the password, and set it to AP mode. ASUS makes it really easy to do this. AP mode in the ASUS firmware disables the firewall, IP sharing and NAT. Everything will be handled by the upstram router. I set up my wireless networks and plugged the ASUS into one of the LAN ports of the WRT610N.
Finally, I’m a big fan of having custom DNS at home so I can access routers and servers without having to remember IP addresses. OpenWrt makes this really easy. In LuCI, I opened the Network > DHCP and DNS menu item and set the Local server to the top-level domain I wanted to use and the Local domain to the domain I would like to be postfixed on all computer names and automatically handled by internal DNS. For example, let’s assume there’s a computer named Hector that’s connected to the LAN. If we set Local server to /lan/ (the default) and Local domain to my.lan, we would be able to resolve hector.my.lan.
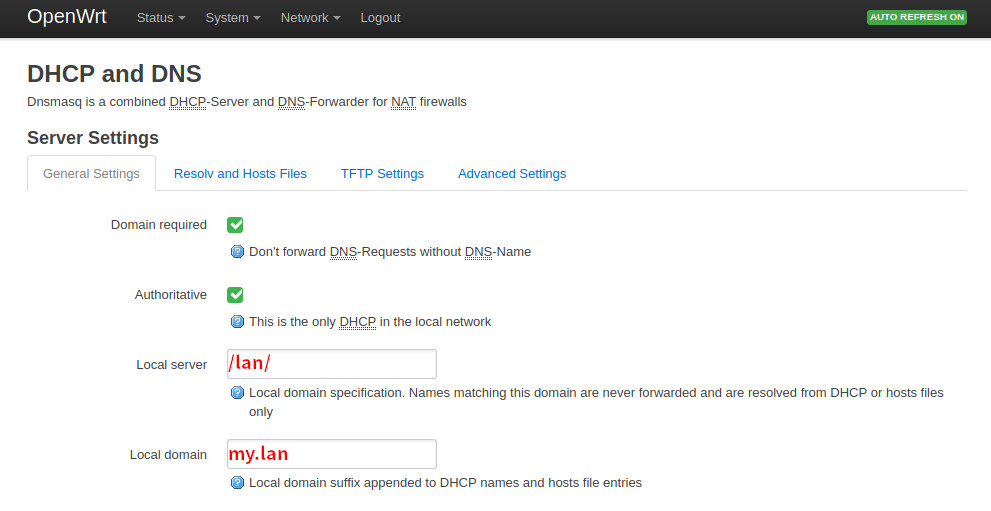
After setting the local server and domain to the settings I wanted, I added some static leases at the bottom of the Network > DHCP and DNS page. I added my wireless router and the one server I had setup. Now I can use fully-qualified domain names to access the management consoles for my routers and my local servers. As a bonus, OpenWwrt automatically provides a hostname for the router so you can access it via openwrt.[configured domain]. Using our example above, it would be openwrt.my.lan. Sweet! It can be changed via the Hostname field on the System > System page.
2020-01-08